
I am not new to panoramic photography. In the film days, I printed carefully captured frames and mounted them side-by-side, creating the panorama. There was one on my mother’s living room wall. I wish I had that now! Even later, I photographed multiple frames of color negatives or slides even though I had little chance to print them myself.
In the last few years, I have scanned thousands of film frames and some yielded digitally stitched panoramas. I want to start this review with these old-timers. These are modern digital stitches from decades-old film frames.
Bodrum, Turkey, 1987
Aphrodisias, Turkey, 1987
The emergence of digital photography made panoramic photography so much more accessible, sometimes even hand-held. I also have many hand-held stitched panoramas. However, even a home-made panorama head makes the process more reliable with better results. But a well-built, high-quality panoramic head makes the process so much easier and pleasant.
Canytelis, Mersin,Turkey, 1996
Reliefs on the side of a sarcophagus, Diocaesaria
Rogeti 360 Panoramic Head
Having reviewed a couple of their products, I was highly impressed by the quality of The ROGETI 360 panoramic head ($359). I welcomed the opportunity to review their equally well-made panoramic head.
Disclosure: ROGETI provided the review sample, but the post contains no affiliate links, nor do I get any commission from sales.
The fundamentals of a panoramic head do not change. There is some form of an L-bracket base providing horizontal rotation and a slider plate for nodal point adjustment and vertical swings. ROGETI favors a reasonably compact but sturdy L-bracket base making the fully assembled gear quite compact, albeit not compatible with some larger camera bodies.
The base fits onto one of the rotators (CAP-360) allowing it to slide right and left to position the camera and the lens properly. The nodal point slider clamps on the other rotator with a ridge-to-notch match (see photos below). The camera with an Arca plate or L-bracket mounts on the sliding clamp on the slider. When all are connected, the assembly exudes the typical high quality of ROGETI products.
How to assemble the Rogeti 360
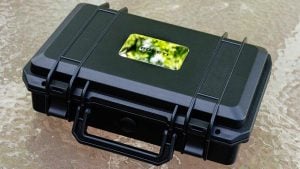
As you open the black, hard plastic case, you have all the components for successful panoramas.
First, mount one of the two identical rotators on your tripod. This could be either a T32 tripod with an Arca clamp or your tripod. In some pictures below, you will see it on the T32Lite I reviewed and on my Really Right Stuff ball head when I took shots to adjust the nodal points.
Fully assembled. Note only the camera moves, not the plate
After the base is in place, carefully attach the nodal point slider plate to the other rotator. While doing that, match the plate’s ridges to the rotator’s notches. This will create a fixed point from which the camera will separate by the required distance to prevent parallax distortion.
Now, screw in the retaining knob for the rotator on it and carefully slide the plate on the U-shaped opening at the top. Make sure to line up the little bump on the base with the slit on the Arca plate on the rotator and tighten the knob. Please note that although the nodal slider plate can be mounted to slide in the rotator clamp, the proper way to mount it is to match the ridges on the slider with the notches on the rotator as mentioned above.
The slider with one end fixed at the rotator
Now, mount the camera on the sliding clamp on the slider plate. If your L-bracket or plate has proper markers, align the zero point with the marker on the clamp as you see in one of the images below. Otherwise, slide it in the clamp to line up the lens axis with the center of the nodal plate. You can also use the tripod screw hole on the camera base which is usually centered.
If your plate or L-bracket has one align the zero point with the marker on the clamp
You don’t want both the slider and the camera to move
Eliminate parallax error
The first thing to do before rushing out is to find the proper position of the camera on the nodal point slider to eliminate parallax error. I will repeat the cliche and ask you to hold your thumb up and stretch your arm. Line up your thumb with a distant vertical marker, say a window frame.
Tiny ridges on the slider need to be set with the notches on the rotator
Tiny ridges on the slider need to be set with the notches on the rotator
Now, as you rotate your head slowly from side to side, with one eye closed, you will see that your thumb will change its position. This is what we call the parallax error. If you only move your eye(s) while keeping your head fixed, you will notice that your thumb stays put because your “lens” is rotating on its nodal point.
The next few steps can be done with the full panoramic head assembled. However, using only one rotator and the nodal point slider is easier. Start by mounting the slider on one of the rotators paying attention to the alignment of the ridges with the notches. Then, level the tripod head clamp and mount your camera, lining up the zero marker on the bracket with the marker on the clamp.
Line up the clamp marker with zero on the bracket
Ready to correct parallax error
Place a vertical bar, like I used the tripod center column, and align it with a distant vertical element. I chose the fence post at the end of the garden. Select one focal length when using a zoom lens. In the viewfinder or the rear viewer, watch whether the two lined-up objects separate as you carefully rotate the camera as far to the right and left while keeping them in the frame. Unless you are lucky, the initial positioning of the camera may not be correct.
Then move the camera backward or forward on the nodal point slider while it is rotated to bring the two vertical elements in line. Once they seem lined up again, swing the camera to the other side and see if the positions hold. Repeat as necessary.
The tripod column and fence post are aligned
The tripod column and fence post are not aligned
The tripod column and fence post are not aligned
The tripod column and fence post are aligned
The tripod column and fence post are aligned
The tripod column and fence post are aligned
Once the vertical elements are lined up, note the camera position on the slider. I did this when the lens was set at 50mm, and I took a picture of the lens, and then the camera position on the slider. After this round, I repeated the same for 24 mm and 100 mm settings.
Lens set at 50mm
Camera set at 95
Centre the camera on the base
In addition to addressing the parallax error, we must ensure that the camera rotates around the lens axis. For this, we need the entire gear assembled on a tripod. Rotate the nodal slider to have the camera pointing straight down. You will see the zero marker on the dial that may help with that.
Make the camera look straight down
Align the lens centre with the centre of the column
Gently loosen the rotator clamp holding the base and slide it until the center of the lens aligns with the center of the tripod and tighten the clamp. Now note the position of the base and jot down the number for future use. It is now truly ready to use!
Note the number for camera positioning
Get ready to shoot!
Now that we have measures to prevent parallax errors, we can start shooting panoramic series for stitching. Every photographer may have different rules they observe. I will share a process you may or may not want to follow.
I study the area and subject(s) for the best time to photograph and decide on the panorama type, horizontal, vertical, single or multi-row, etc.
Pick the lens to use, prime lenses may have advantages; if using a zoom lens, decide on the focal length
If I shoot a horizontal panorama, I mount the camera in portrait mode as it provides a greater vertical angle of coverage; the same results may well be obtained by mounting the camera in landscape orientation and shooting more than one row
Consider setting a white balance suitable for the occasion instead of auto, avoiding color balance shifts as the lens covers different and strong colors
Alternatively, select all the frames and set the white balance to the appropriate one in post-processing
Manual exposure may be better for a similar reason; it does not get skewed by different levels of brightness
Whenever possible, avoid auto-focus, pick the most important area, focus there, and not change focus from frame to frame; the f-stop setting may help control the depth of field
Set up the tripod, and level the clamp or the mounting screw plate using a bubble level if necessary
Mount the rotator using its Arca plate or tripod screw and the panorama head base; position it using the previously recorded setting
Make sure the nodal slider is properly mounted and the camera is in the position as previously determined to prevent parallax error
Remember that each frame needs to overlap the previous one by one-third to a quarter of the width; try a dry run by rotating the base to see what rotation angles to use which are marked clearly on the rotators
Use a remote release, these days I use the Canon Camera Connect app on my phone to preview and then release the shutter
Now, I cannot wait to go out and find a couple of interesting subjects or locations!
Using the Rogeti 360
I took the ROGETI 360 for a real panoramic project yesterday afternoon. Because I was somewhat rushed, not well prepared, and had a couple of minor glitches on the Panoramic Head. The result was unusable. Today, I repeated the same experiment and made sure I avoided the problems. And I have a very nice photograph of St. Paul’s Church at the corner of Warwick Ave. and Broad St.
Notes from my experiences
Make sure your tripod head has a levelling bubble; I used the bubble on the ROGETI base on the first day
When photographing a tall building, you will tilt the camera at steep angles making viewing the back screen very hard to impossible
Approximating the overlaps by eyeballing does not work
Do a dry run of panoramic tilts and swings to check the necessary rotation angles; I did that more carefully today and even was overly cautious and ended up with more frames than I needed. That’s OK, it is easier to dump or skip than miss a section
Make sure the clamps are tight and secure; my camera slid on the nodal slider messing up all the alignments
The small rotational lock levers may be hard to loosen if your fingers are not strong like mine
My process
Level the tripod head, yes I took a different tripod this time
Mount everything carefully and double-check
Select the rotation angles, I used half stops after starting at zero points at the base, and the camera rotator
The camera was mounted in the landscape orientation to cover more horizontal angle of view; the 18-150 mm zoom lens was set at 50mm
Exposure and focus were set to manual, 1/320 sec at f/11
I shot at the lowest row beginning with the center frame, then rotated the camera twice at half stops to the right and then to the left, and repeated the same sequence on the higher rows
I tilted the nodal slider by half a step and repeated the sequence until the top of the spire and some sky above were included
I ended up with 35 frames which proved to be too many; using the center and one step to the right and left frames gave me ample overlap with 21 frames instead of 35
After I tried the stitch in Lightroom which took too long with all 35 frames, I tried it in PTGui; I like to use PTGui because I can do most of my perspective corrections by moving the stitched result
I decided the intruding street light on the left and many electrical wires were too distracting for this panoramic view and removed them, apologies to the originalists
The finished vertical panorama is about 13300 x 20000 pixels, 266 MP, and I would say it is a successful stitch. After aligning the images in PTGui, I clicked on the Optimize option, and the resulting report seems quite impressive, see it in the following small collection
Mount the base rotator on tripod head
Set the nodal slider at zero
Mount the camera
PTGui optimize report
And, below is the result, before and after serious cleaning. I prefer the one with the pole as it gives a serious hint of serious wire cleaning.
St Paul’s church, Cranston, before cleaning image
St Paul’s church, Cranston – heavy cleaning
St Paul’s church, Cranston – heavier cleaning
I also tried a horizontal panorama in Providence. Using the process I described earlier, I set up the gear, exposure, and focus and took nine frames from left to right. This time, the camera was mounted in the portrait orientation to increase the vertical angle of coverage. Once the gear is set up properly, taking the pictures and rotating the base by half a marker for the next goes quickly. I even had time to stand for a shot Jan took!
On the pedestrian bridge in Providence, by Jan Ekin
I then stitched two versions in Lightroom, perspective and cylindrical projections. After that, I exported the frames as TIFF files and stitched them in PTGui. You will see it in the following images, but I want to say it anyway. I saw little difference between the Lightroom and PTGui versions. And, in both instances, the Cylindrical projection produced more realistic results.
In Lightroom, the stitched result had a tiny blank space around the edges, and I let the software fill them. If there are no straight lines near the top or bottom edges of the scene, I recommend cylindrical projection over perspective. Here are the results in two sets.
PTGui cylindrical projection
PTGui rectilinear projection
Lightroom cylindrical projection
Lightroom perspective projection
Conclusion
I have enjoyed using this panorama head. It conveys far more confidence and quality than my make-shift one! Quality and simplicity will impress anyone.
The ROGETI 360 Panoramic Head is a well-built, high-quality piece of equipment
Components are easy to assemble
The nodal point slider with a rotator can be used for single-row panoramas without the base
If you are interested, it is also eminently capable of creating 720-degree panoramas for VR
With all the precision components that are relatively easy to use, it is well worth the price, currently $319
It simplifies the process of capturing a series of frames on single or multiple rows
It is not compatible with some larger camera bodies, but no problem with my Canon R7
Further suggestions
The clamp knobs may benefit from a little size increase as I found them hard to tighten, and once the clamp carrying the camera slid
The rotators may be easier to use if they had more friction, ideally an adjustable level of friction when slightly loosened rather than releasing the grip entirely


