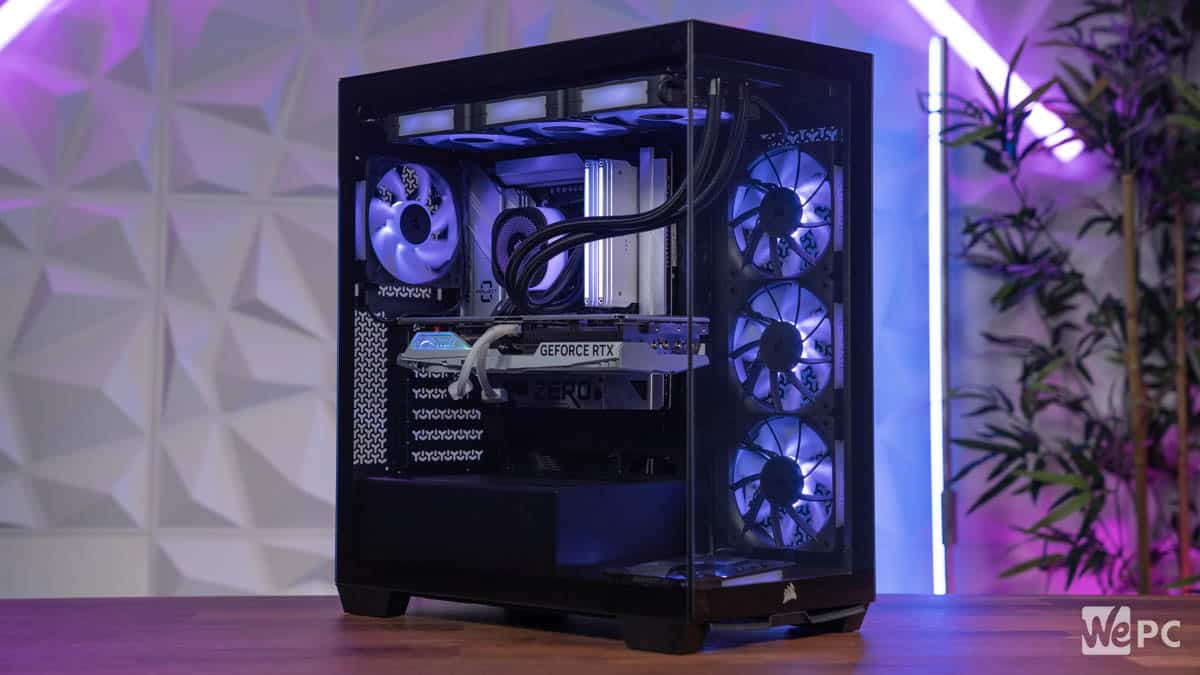

We combined the new budget-friendly back connect case with the company’s latest customizable CPU liquid cooling to see what we’d get Updated: Sep 4, 2024 12:47 pm WePC is reader-supported. When you buy through links on our site, we may earn an affiliate commission. Prices subject to change. Learn more Table of Contents Table of Contents SPONSORED PIECE Corsair have recently released both a new PC case and an new AIO cooling solution, so we thought it would be a smashing idea all round to combine both into a new PC build. The components in question are the Corsair 3500X case, a new, budget-friendly back-connect case compatible with both ASUS BTF and MSI Project Zero motherboards, and also the customizable iCUE Link Titan RX RGB AIO. Without further ado, let’s get stuck in! Corsair 3500X case Specifications case form factor: ATX Tower motherboard support: Mini-ITX, Micro-ATX, ATX, E-ATX (305mm x 277mm) max GPU length: 410mm PSU support: ATX radiator support: Top: 120 / 240 / 360mm, Rear (side): 120 / 240 / 360mm included fans: either fanless or 3x RS120 ARGB or 3x iCUE LINK RX120 drive mount support: up to 2 x 3.5” or 2 x 2.5” case I/O: 1x USB 3.2 Gen 2 Type-C, 2x USB 3.2 Gen 1 Type-A, 1x Audio in/out dimensions: 460mm x 240mm x 506mm weight: 9.71kg Show more The 3500 series is the latest entry to the Corsair range of back-connect PC cases, which includes the 2500 and 6500 series. Whereas these latter two case lines are both dual-chamber cases that have quite large rear compartments and are wider as a result, the 3500 series has a more conventional desktop tower form-factor, making it narrower and taller on your desk (or beneath it). There’s still enough space in the rear for all the additional cables of the back-connect build however, plus lots of space in the main compartment for airflow and larger components. The case can accommodate graphics cards up to 410mm in length, which includes even the largest RTX 4090s currently available, so virtually any GPU you can buy. Maximum PSU length is 180mm, which means you can fit in a full-size ATX-size power supply (which measure 150mm x 86mm x 140mm as standard). In terms of cooling you can fit two 360mm radiators (each comprising up to three 120mm fans): one on the top and one going up vertically on the side close to the front panel; there’s also space for an additional 120mm fan on the back and one on the bottom. At present the 3500 series is limited to the 3500X with its rather fetching wraparound glass panel view. It’s possible that a mesh panel variant may be introduced in the future as was the case with the 2500D and 6500D, however the tempered glass version has always been our favourite coz it looks so damn good with all your components lit up inside. The case has screwless size, front, and roof panels so you can pop them on and off with ease if you want to have a tinker. Probably the best thing about the case though is the price: you can pick up the most stripped down version for $84.99, the ARGB version with three pre-installed RS120 fans for £119.99, or finally the iCUE Link version with three pre-installed RX120 fans and iCUE LINK System Hub for £169.99. All of these variants are available in either black or white. iCUE Link Titan RX RGB AIO Specifications Pump: FlowDrive 3 phase pump Fans: 3x 120mm Corsair RX120 fans Max rotational speed: 2100 RPM ±10% Screen: not included but LCD screen can be added separately Weight: 1.88kg Dimensions: 396mm x 120mm x 27mm The iCUE Link Titan RX RGB AIO is the latest All-In-One liquid cooling setup, compatible with either Intel or AMD processors. This new model comes with customizable ‘CapSwap modules’, essentially meaning you can buy extra upgrades like an LCD screen, and mix and match them, which is a very nice feature.. As the name would suggest, it’s fully compatible with the iCUE Link system, meaning fewer cables in your build, plus extensive RGB controls for the 20 different LEDs on the pump itself, plus the eight on each of the fans. The water block section is powered by a FlowDrive 3 phase pump and comes with an optimized convex cold plate with pre-applied XTM70 thermal paste, so you don’t have to bother yourself: it’s even applied in a pleasing pattern! This cooling solution is high performance, yet remains nice and quiet, both in terms of the pump section and the three RX120 fans in the radiator (which used elsewhere in our build). The fans are high-static pressure models, capable of pumping air with force through and over your components without needing to spin at velocities that would cause increased noise volumes. The components we used We were sent the iCUE Link version of the 3500X with its three pre-installed RX120 fans and iCUE LINK System Hub, onto this we added another couple of RX120 fans, plus the iCUE Link Titan RX RGB AIO. We used the MSI Project Zero B650M as the motherboard, though other ASUS or Gigabyte back connect motherboards could be used (or just normal boards if you don’t don’t care about the back-connect feature). We had a white Nvidia RTX 4060 Ti knocking about so used this as our graphics card, and picked some of the new white Corsair Dominator Titanium (with RGB) for our memory to match the aesthetic, plus a cheap M.2 SSD drive. Given we’ve had the latest AMD Ryzen 7 9700X in to review we thought we might as well throw this in for the processor, though do be aware you may need to flash the BIOS with a USB drive using the onboard flash utility in order to update the motherboard to make it compatible with this new CPU. With all the above components, an 850W PSU would be quite sufficient, though we had a 1000W ATX-sized Corsair one knocking about (our favored PSU brand anyway) so just used this to power our rig. Specifications Cores: 8 Thread: 16 Boost speed: 5.5GHz L1/L2/L3 Cache: 640KB/8MB/32MB Deafault TDP: 65W Specifications Capacity: 32GB (2x16GB) Speed: 6400MHz Timings: CL32 Specifications Form Factor: ATX Memory Support : 64GB / DDR5 7600MHz (OC) Socket : AM5 Chipset : B650 Specifications Wattage: 1000W Modularity: Fully modular Efficiency rating: Gold Compliance/compatibility: ATX3.0, PCIe 5.0 Dimensions: 5.91″ x 5.51″ x 3.39″ Weight: 3.7lb Specifications Airflow: up to 74.2 CFM per fan Static Pressure: up to 4.38mm-H2O of static pressure per fan Max speed: 2,100 RPM Sound Level: 10 – 36 dBa Dimensions: 4.72″ x 4.72″ x 0.98″ Assembling the build Previous Next The 3500X has ample room in the main compartment area, and a respectable amount in the rear of the case as well, even if it’s not as roomy in the rear compartment as a dual-chamber build. This, plus the plentiful slots and openings to feed cables through between the two sides of the case, meant putting it together was pretty much a doddle. Obviously we’re seasoned PC builders here at WePC, but if you’re a complete newcomer then this is a good case to start on. First, we took off the front and side glass panels to give ourselves the most amount of room in the main compartment; these come off nice and easy and are completely screwless, though have a couple of notches at the bottom to prevent the panels from just falling out when you’re taking it off. We then removed the rear mesh panel. After installing the CPU, RAM and M.2 SDD into the motherboard, we screwed the board down onto the stand-offs that are preinstalled into the case, using the screws from the case. We then unboxed the PSU, plugged in all the power cables we needed, then screwed it into place. We plugged-in as many of the power cables as we could at this point into their respective slots on the back of the motherboard, including the power cabling for the case IO and RGB. Next, we unboxed the Titan AIO, removed the standard mounting that came pre-attached and replaced them with the AMD mount that came in the box. After lifting off the top mesh panel, the AIO radiator (comprising of three 120mm fans) was screwed into the top. We then secured the water block to the mounts around the CPU and screwed it down. Then came the rest of the fans, which were all Corsair RX120 RGB, 120mm, iCUE Link compatible fans. Using Corsair’s own QuikTurn screws we secured three intake fans into the vertical space next to the front glass panel, another intake fan into the bottom of the case, and a final exhaust fan on the back of the case next to the rear I/O. All of these fans were daisy-chained together and to the AIO radiator, using the included cables, and attached to the iCUE LINK System Hub in the rear of the case with the rest of the wiring. Finally we plugged in the graphics card after unscrewing and taking out two of the expansion slot plates on the back of the case, did a final check, then turned the PC on! Once we were sure everything was working correctly, we tidied up the cabling in the back and replaced all the panelling to enjoy the finished product in all its glory. Booting it up Once everything’s plugged in and you press the power switch, you should see your RGB components light up, including both the fans and the water block on the Titan AIO. However, you might have to go into Corsair’s iCUE Link software to get all your components to be the same color, or if there’s one or two that aren’t working: this can happen, particularly when you’re running different types of components. First, install Windows, then make sure all the necessary drivers are downloaded and installed by searching ‘Check For Updates’ within Windows, and downloading whatever the latest driver is for your particular graphics card (this will likely require you to restart your PC). After you’ve done this, download and install the latest version of the iCUE LINK software (you can make sure you’re running the latest version by clicking the cogwheel icon in the top right of the iCUE LINK software), download all the necessary firmware for all your different pieces of ha then restart your computer once again. Finally, open up the iCUE Link app, and under Link System Hub, navigate to Home > Lighting Setup and follow the steps of the setup wizard. You can access different animations, layers, and component groupings here. Under the Hardware Lighting section you can also set different effects, plus change the RPM curves etc. for the fans under Fan Control.


