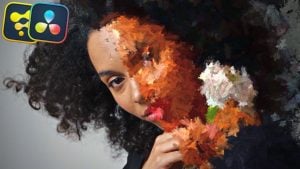

The Fusion page within Davinci Resolve is incredibly potent. It allows you to make creative decisions you wouldn’t have thought possible in a video editing program. While the examples of this are countless, for this post, let’s focus on just one of these thousands of possibilities: turning a video clip into a moving painting. Nomad R Productions already made a thorough video tutorial on how to do this; let’s sum it up in words.
Step one: get a brush stroke
To achieve the painterly look, you would need to get a brush stroke image. The type of brush stroke it is will affect the look of the final result. It doesn’t matter where you get the image from; you can use Canva, Google Images, or even make your own brushstroke in Photoshop. Just make sure to select a black-and-white image for an easy workflow.
Step two: make a particle system for your subject
Now, head over to the Fusion page. The first thing you need to do is separate your subject from the background. You want different brush stroke animation settings on the subject and in the background. Optimally, the subject of an image has more detail than the background, so the settings will be set accordingly.
You can use any method you like to separate the subject via masks. You can manually set a mask, use DeltaKeyer if the frame isn’t too complex with colors, or if you have the Studio version of Davinci Resolve, use Magic Mask to automatically create a mask for you.
Next, you need to add a pEmitter and a pRenderer. Change the pRender output mode to 2D. In the pEmitter, go to the Region panel and change the region from sphere to bitmap. Go back to the controls panel and change the temporal distribution to “all at the same time” and the color to “Use color from the region”. Head over to the Style panel and change the style to bitmap.
Step three: insert the brush stroke
This is an easy step. Just drag and drop the brush stroke image onto the board. We only need the shape of the brush stroke and not the entire image frame, so we can use Luma Keyer and only take the white or black part of the image. Once we done that, we can connect it to the pEmitter.
Step four: adjusting the image
If we choose to display the pRender, we should start seeing a result by now, but it still needs adjusting. For your subject, go to the pEmitter and increase the number parameter until you reach a high amount (the correct number will vary from image to image, so start with 1000 and adjust from there). Then, bring the lifespan down to one. Under rotation, bring up the Z variance so it won’t look like each stroke is the same. To further increase variance, head over to the style panel and change the size variance and the red, green, and blue color variance.
You can go a step further by mixing different brush strokes. Simply copy past the pEmitter to make an instance pEmitter, plug the subject mask into it as well, and choose “region bitmap”. Now, you can import another brush stroke image, use a Luma Keyer, and connect it like the previous one. Once you’re done, just connect the instance pEmitter to the original pEmitter to create a merge. Repeat this as many times as you want with as many brush strokes as you want.
Step five: repeating the effect for the background
Copy the particle system from before, but don’t copy the subject mask. Paste it on the board, and connect the original MediaIn1 to the pEmitter of this system. It might sound confusing, but what you’re doing is applying the effect to the entire image, not just the mask. The reason why you would want to do this after separating the subject is that now you can change the settings of the brushstrokes to fit the background without worrying that it will change anything about the look you achieved with the subject.
As mentioned prior, we aim to have less info in the background than the subject. So, to accommodate this via the particle settings, we need to go to the pEmitter and lower the number a lot. Now, there will be a lot of holes in your image, so to fix this, move to the style panel and increase the size of the particles until they cover all the holes. Now, merge the pRedner of this system with the pRederer of the system that covers the subject.
Step six: fixing the jitter
It may look jittery at this point, so you can use StopMotion nodes to control the pacing of the brush changes. Simply connect one StopMotion node to the subject system and one to the background system. Set the one connected to the subject to two to “halve” its frame rate and four for the background system to “halve” it twice. The result is that everything is less flickery, and our eyes can separate the subject and background more easily


