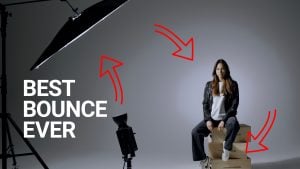

There is quite a lot you can do with a single light and a reflector. And today, I will share nine* lighting setups that we built with just that: a single light and a reflector. The reflector that I used here is the Snapbridge Glide ($1,865), which is a unique combination of an ultra-bounce umbrella from DOP Choise, and a set of reflectors from The LightBridge. The reflector “sits” inside the umbrella and you can swap reflectors to get different effects. I know it sounds weird, but watch the video, it’s very easy to follow.
We took the Glide for a day in the studio and came up with over nine unique lighting setups, plus a few more that blew us away. I would not consider this a full review, but more of an overview of the tool and what it can do.
Setup 1 – Classic Rembrandt+
Classic Rembrandt Lighting with a soft umbrella
Rembrandt lighting is probably the first lighting scheme that anyone learns. It is extremely easy to recognize by a triangle under the model’s eye. It is also one of the easiest setups to create, by placing the light at an angle of 45 degrees to the side of the model, and 45 degrees to the horizon. The + comes from a little extra punch you add with a hard light. It adds a “pop” to the light. Making it a bit more dramatic even if it is generally a soft light. In this case, we used a Nanlux Evoke 1200B and a smaller Forza 60BII.
Rembrandt+ Lighting with a soft light and a hard light
I love the lighting that comes from this setup, but to be honest, I hate setting it up with multiple lights and cables. What I did here is use the Snapbridge Glide to provide several layers of light. The umbrella provided the softer wrapping light, while the diffuse plate provided the harder light. As a note, there is a note light for the background, which is not part of the “Rembrandt setup”, but it makes an overall nicer image.
Rembrandt+ Lighting with a SnapBridge Glide and reflector
Setup 2 – Rembrandt storm
Now, that you have the classic Rembrandt look nailed, there is a lot of control you can exercise. There are a few reflectors in different sizes and reflection levels, and you can swap those to get a different balance on the hard-soft light gamut. Here is a quick reference card with a few levels of diffusion provided by swapping the different reflectors on the Glide.
Rembrandt+ Lighting with a SnapBridge Glide and various reflectors
Setup 3 – Low Key Rembrandt
I promise that this is going to be the last Rembrandt lighting setup 🙂 It is a bit different because this time, we changed tow things: we removed the background light, and we flipped the Glide. Now, instead of a light bouncing off of a highly reflective material, it is hitting a black fabric so we get no spill.
Low key Rembrandt+ Lighting with a SnapBridge Glide and various reflectors on the dark side
Setup 4 – Top light
If you have access to a high ceiling (which we had in Hagalil.1 studio), you can mount the Glide and get a light that is incredibly controlled and is very reminiscent of sunlight. And this is where the SnapBridge really shines (no pun intended). For one, it is significantly easier to mount a reflector when you go this high. It is lighter than a full COB LED (Aputure 600D with an F10 Fresnel), and it is easier to move around. Secondly, you don’t need any power; the actual light source stays low. Dealing with cables in high places is a nightmare, and the fact that the big heavy light stays on the floor, closer to a power outlet, makes the setup faster, easier, and less dangerous. The third thing is that the light travels twice the distance from the light to the model. This makes the light rays parallel, which is similar to sunlight and more pleasing to the eye.
SnapBridge Glide top light with a Fresnel
SnapBridge Glide top light with a Fresnel
I used a Fresnel to direct the light into the Glide and control some spill. But if you need more control, then:
Setup 5 – extremely controlled top light
This is an incredibly similar setup, only here, we are using a Leko attachment so we can pinpoint the light only to hit the Glide. This gives an incredibly focused spread of light.
SnapBridge Glide top light with a Leko attachment
SnapBridge Glide top light with a Leko attachment
Setup 6 – Close up Leko
Out of all the setups that day, this was my favorite. The amount of control you can extract from this setup is unbelievable. Note that we only needed to move a Leko light that was very close to the floor, getting that amount of control by moving a huge light would be significantly harder.
Bonus – Multiple light setups with a single light
One nice thing about the system is that both the umbrella and, even more so, the individual reflectors are incredibly reflective. In fact, they have enough power to serve as double (or even triple) duty lights. These last two setups use a 1200 Aputure, the Glide, and a reflector to create a key, a fill, and a backlight.
Conclusion
Playing with the snap bridge was a lot of fun. It is one of those rabbit-in-a-hat modifiers that are extremely versatile. I’ll be direct and say that investing almost $2,000 in a reflector is not for everybody. But, considering the amount of versatility that you get at a certain level, it just makes sense.
*depending on how you count the setups, you probably got anywhere between six and twelve setups, not including the bonus setup. I averaged at nine 😉


