
If you’ve updated to the latest and greatest versions of Adobe Lightroom or Adobe Camera Raw, you might have seen a very small inconspicuous button in the top right-hand corner labelled ‘HDR’. Like me, you might think, brilliant, here’s a new handy tool.
However, things are not quite what you might assume. I wasted a whole evening of editing by misinterpreting what this was for. Hopefully, now you won’t have to, you’re welcome!
So let’s just get the excuses caveat out of the way. First, I was editing some photos for real estate on my iPad because I was travelling and trying to save time. I’d shot multiple exposures of some of the rooms, intending to do an HDR merge in Lightroom.
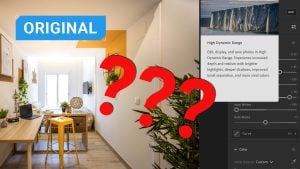
Because I was editing on my iPad (which I don’t normally do), I was unfamiliar with the mobile version of Lightroom, so I couldn’t find the merge to HDR setting. That was when I spotted this little button labelled HDR in the edit tab.
“Amazing!” I gleefully thought, ignoring the ‘Would you like to know more about what this does?’ prompt. “Of course not, I’m just going to play with it and figure out what it does,” I thought.
And it seemed pretty cool. One click of the button, and a few twiddles with the sliders later, I had some pretty impressive looking HDR-esque photos (not too HDR, mind, just enough to not have the windows blown out and have the room lit properly). I was convinced and kind of wowed by Lightroom’s capabilities at this point.
Blind-sided
So I finish the entire session, export the images and send them to my client. Who promptly downloads them and sends me a sort of polite ‘what the hell?’ message saying my images have basically blinded him with how bright they are.
That was my second mistake, I normally check the exported images before I send them. So back to Lightroom I go, where I am confused because the images look great on my calibrated screen. I wonder if he has his screen settings all weird. Apparently not.
I check the exported images, and indeed, they are migraine-inducing bright and not at all how they looked in Lightroom when I exported them. I try sending one to edit in Photoshop and discover that all that delicious dynamic range is gone, only to leave an image of a room that looks like it was about five metres from the sun’s corona. “How strange”, I thought.
Not what it says on the tin
And now, only at this point, do I start working out what the HDR button is for (yeah, I know…I’m blaming it on the busy Xmas run-up!). It turns out that this button that claims to be HDR DOES NOT CREATE HDR IMAGES! Or rather, it does, but it does not blend multi-exposure images in the way that we have come to know as HDR.
Adobe explains what it’s all about in this recent blog post. It turns out that the HDR button is purely for optimizing images to be VIEWED on HDR-compatible screens. So that you can see how the image will look, essentially, and make adjustments as necessary. It is not for creating an HDR merged image (or an effect of one from one photo) in the way that most of us understand.
Only someone viewing on a screen with high dynamic range capabilities will even be able to see how it looks. Ok, that’s fine, you might think. It shouldn’t affect the image if they don’t have that sort of screen enabled.
Except that it can affect the overall output, as my oversight shows. There is an SDR tab that you can open to check how the image will look without the HDR screen. I would be extremely careful because I found that generally, the images looked a lot worse, even after tweaking this, than they looked ordinarily.
Export to HDR file
You also need to export the images to HDR-compatible file formats (AVIF and JPEG XL), or simply view them in Lightroom. Cool if you’re only showing 5 people, but not so cool if the whole student population wants to consider renting the apartment and ends up losing their retinas in the process.
Adobe says, “For now, this means that some apps and platforms will be able to show your HDR photos, but others cannot. I expect this situation to improve over the next couple of years.”
This video explains all about the button and how to use it for good rather than bad (real estate images):
In general, it’s usually a good idea to try new features out thoroughly before using them with paying clients. I guess I was feeling over-confident! Anyway, no harm was done, I re-edited the images normally (on my computer), and my client was happy.
This new HDR display feature does seem interesting, especially if people are viewing your images on a screen in a controlled situation (like in an exhibition or an online gallery). However, do bear in mind that the majority of people are not going to be ready for this yet and won’t have the need for this feature.
The examples in the Adobe blog are certainly worth having a look at to see if this might be useful for your work. I will be being a little bit more cautious in future with it!


